
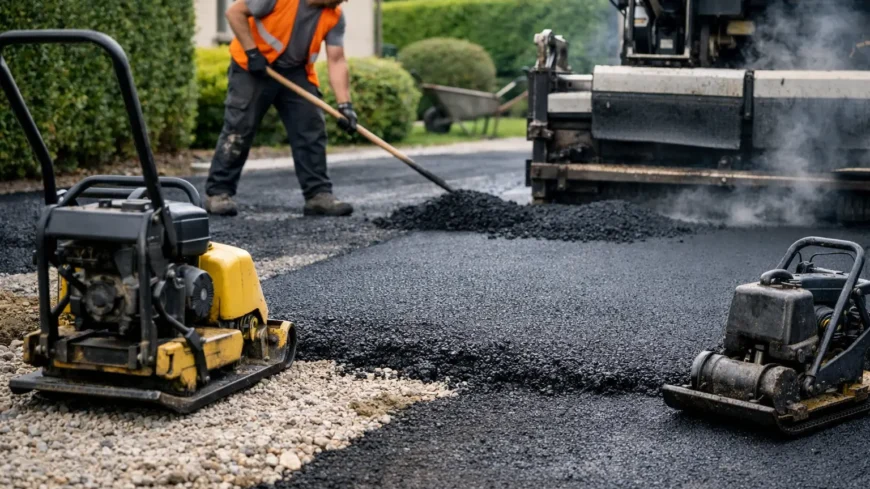
A tarmac driveway should not start with a lorry turning up and a crew laying blacktop over whatever is already there. The real tarmac driveway installation steps begin well before the surface goes down, and that groundwork is what decides whether the drive stays solid for years or starts sinking, cracking or holding water far too soon.
For homeowners, developers and site managers, that matters because the finish is only part of the job. A smart-looking drive can still fail if the base is weak, drainage is poor or levels have been rushed. If you want value for money, you need to know what proper installation looks like from the ground up.
Why the order of tarmac driveway installation steps matters
Tarmac is a durable, cost-effective surfacing choice, but it relies on what sits underneath it. Unlike block paving, where individual units can sometimes be lifted and adjusted, a tarmac surface works as one continuous layer. If the foundation moves, the surface moves with it.
That is why experienced contractors do not cut corners on excavation, sub-base preparation or compaction. Each stage supports the next. Get the sequence right and you get a driveway that handles traffic, weather and day-to-day use. Rush the early stages and problems usually show up fast, especially through standing water, soft spots and edge breakdown.
Step 1 – Site survey and planning
A proper job starts with a site visit. This is where levels, access, drainage, existing ground conditions and the intended use of the driveway are checked. A domestic driveway used by two cars needs a different approach from a larger forecourt or a drive used by heavier vehicles.
This first step is also where practical decisions are made. Should the old surface be removed or can anything be retained? Will edging be needed to contain the tarmac and keep the lines clean? Is there a fall on the site already, or will levels need adjusted to move water away from the property? These are not small details. They affect both performance and price.
In Scotland, where heavy rain and freeze-thaw conditions are common, drainage planning is especially important. Even a well-laid tarmac drive can struggle if water has nowhere to go.
Step 2 – Clearing and excavation
Once the plan is agreed, the area is cleared and excavated to the required depth. This means removing old surfacing, loose material, vegetation and any unsuitable ground beneath. The depth depends on the existing ground and the finished build-up required, but the point is always the same – reach a stable formation that can support the new surface.
This is one of the most overlooked stages by cheaper operators. If excavation is too shallow, there is not enough room for the right sub-base and surface layers. That often leads to a driveway that looks fine at first but begins to rut or settle once vehicles start using it regularly.
Excavated waste should also be taken away properly. Leaving spoil piled on site or reusing poor material in the build-up is rarely a good sign.
Step 3 – Installing the sub-base
The sub-base is the structural backbone of the driveway. Typically, this is made from a quality aggregate laid in layers and compacted thoroughly. The aim is to create a firm, load-bearing foundation that spreads weight evenly and resists movement over time.
Compaction matters just as much as the stone itself. A sub-base that has been tipped in and barely rolled is not a proper foundation. Good contractors build it up at the right thickness and compact each layer with the right equipment. That is what gives the driveway its strength.
It is also the stage where levels and falls are refined. If the sub-base is wrong, the finished tarmac will follow those mistakes. You cannot expect a smooth, well-draining surface if the base underneath is uneven.
How thick should the sub-base be?
It depends on the ground conditions and how the driveway will be used. A standard domestic drive may need a different build-up from an access route used by vans or commercial vehicles. This is where experience counts. Overbuilding can push up cost unnecessarily, but underbuilding is a false economy.
Step 4 – Edging and kerb restraints
Before the tarmac is laid, edging is often installed to define the driveway and hold the surface in place. This might be block edging, kerbs, granite setts or another suitable restraint depending on the look required and the site layout.
Edging does two jobs. It improves appearance, giving the driveway a neat finish, but it also supports the edges of the tarmac, which are naturally more vulnerable to crumbling if left unsupported. On larger drives or areas with turning traffic, this becomes even more important.
If you want a clean, long-lasting finish, edge restraint should never be treated as an optional extra without thought. Sometimes a plain flush edge is suitable, but often a contained edge gives better long-term results.
Step 5 – Drainage preparation
Drainage should be built into the installation, not treated as an afterthought once water starts sitting on the surface. Depending on the site, this may involve creating the correct fall, installing channel drains, connecting to suitable drainage points or adjusting levels to direct runoff safely.
A common mistake is focusing only on the driveway itself and forgetting the surrounding area. Water should not be sent towards the house, garage or neighbouring property. Good planning looks at the whole picture.
When drainage becomes non-negotiable
If the existing area already suffers from ponding, if the drive slopes towards a building, or if the site has poor natural runoff, drainage needs extra attention. In these cases, a contractor should be clear about what is needed before the job starts, not halfway through the works.
Step 6 – Base course and binder layer
With the foundation ready, the structural tarmac layers can be laid. On many installations, this starts with a base or binder course. This is the heavier-duty layer that adds strength and helps form the final profile of the driveway.
The material needs to be laid at the correct temperature, spread evenly and compacted while workable. Timing matters. Tarmac is not a material you can leave sitting around indefinitely and expect top results from. Proper coordination on site helps ensure a consistent finish and solid bond between layers.
For smaller domestic driveways, the exact specification may vary depending on traffic and build-up. For heavier-use areas, stronger construction may be needed. Again, it depends on the job rather than a one-size-fits-all approach.
Step 7 – Surface course installation
The top layer is the part you see, but it is not just there for looks. The surface course provides the final wearing layer, the smooth finish and part of the weather resistance of the driveway.
At this stage, attention to detail makes a visible difference. A well-laid surface should be even, tidy at the edges and properly compacted. Joints should be neat. Levels should look right against thresholds, paths and garage entrances. If the finish appears rough, patchy or poorly tied in, it usually points to rushed workmanship.
This is also where clients often judge the whole job, understandably so. But the best-looking surface is only as good as the steps that came before it.
Step 8 – Compacting, cooling and finishing checks
Once laid, the tarmac is compacted with rollers to achieve the required density and finish. After that, it needs time to cool and harden before regular use. How long depends on weather conditions and the size of the area, but driving on it too soon can mark the surface.
Final checks should cover levels, drainage, edges, joints and overall appearance. Any covers, channels or transitions to other surfaces should sit neatly. A professional contractor should leave the site clean, safe and ready for handover.
Common shortcuts to watch for
If you are comparing quotes, it helps to know where poor contractors often save time or money. The usual warning signs are shallow excavation, thin sub-base, weak compaction and vague answers about drainage. Another red flag is a price that sounds too good only because key steps have been skipped.
There is nothing wrong with wanting a competitive quote. Most clients do. But like-for-like comparisons matter. Two prices for a tarmac driveway can look miles apart when one includes proper preparation and the other does not.
What good workmanship looks like
Good workmanship is not just a tidy finish on the day. It is a driveway that feels firm underfoot, drains properly, holds its shape and stands up to regular use. It is also a contractor being clear about the specification, realistic about timescales and accountable if something is not right.
That is why experienced surfacing firms put as much focus on preparation as they do on the final layer. For customers across Edinburgh, East Lothian and wider Scotland, that practical approach matters more than sales talk. A driveway is an investment in access, appearance and day-to-day convenience, so it should be built to last.
If you are planning a new drive, the best question is not simply how quickly it can be laid. Ask how it will be built, what sits underneath it, and whether every stage has been allowed for properly. That is how you end up with a surface that still earns its keep long after the crew has packed up and gone.